Showing posts with label DIY. Show all posts

Sunday, January 10, 2016

DIY LEGO Table!

I have a 10 year old LEGO enthusiast!

Yay...she has tons of LEGO sets!
Boo...she has nowhere to set them up to play.
Praise God...DIY LEGO table!
We first started with a 5x5 foot piece of plywood. (3/4 inch thick)  
 We couldn't decide on a color until my mom had the great idea of matching it up to the green LEGO building plates!
Perfect match!
 The base is simply four Trofast storage units from IKEA.  Yep!  I love that place!  
I have two of these in my classroom as well!
I love the way it is starting to look!  The only problem is when those tiny pieces, (Who am I kidding?  They're all tiny!) roll onto the floor.

 So my dad made a trim that goes around all four edges...
... to keep those pieces all on the top!
 Now the fun part!  Sorting all the LEGO bricks into the correct bins!
Now she has room to play with all her LEGO's at once!
Click here to check out where the inspiration came from!


Saturday, October 24, 2015

How to Display Student Writing on Ugly Classroom Walls!

I LOVE teaching at my school...but I HATE the halls!  Seriously, so ugly!  I also wanted a cute way to display our Lucy Calkins writing (first year).   
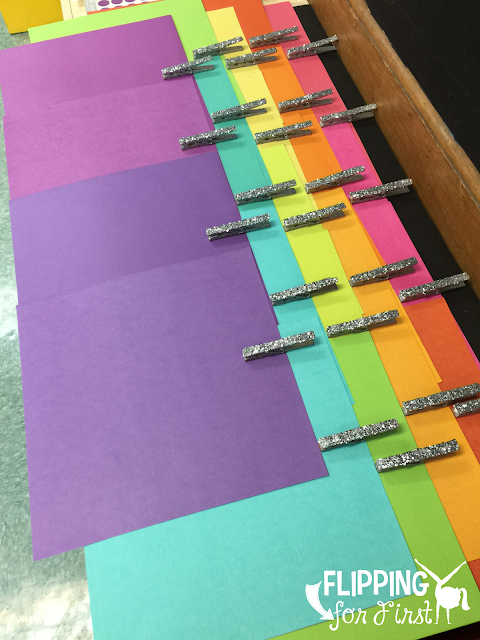
You will need to spray your clothespins with glitter.  This will give them a base layer so they will look pleasing from all angles.  Be sure to spray a glitter sealer over this so you don't have endless glitter on the floor for the rest of your life!

Now to make these clothespins really grab attention!!  Paint Mod Podge over only the top of a clothespin.  Gently dip in glitter and viola!  These are seriously gorgeous!
Spray glitter sealer one more time over the top layer of glitter.
 Grab your favorite 12x12 cardstock paper!  Hot glue glitter clothespin to the cardstock.
Wow Work Display for student writing in the classroom!  Love this craft idea!
Then hot glue a thumb tack onto back of each cardstock.  (My school has tack strips in the hallway.  If you do not have tack strips you can just apply double sided tape and attach to the wall.)
Wow Work Display for student writing in the classroom!  Love this craft idea!
 After glueing I found out (the hard way) that a little hot glue and thumb tacks do NOT stick together!  I had to go back over each one and surround the thumb tack with hot glue.  The pointy part is the only part sticking out of this glue cocoon!
Wow Work Display for student writing in the classroom!  Love this craft idea!
Attach to tack strips (wall).
Wow Work Display for student writing in the classroom!  Love this craft idea!
 Enjoy!
Wow Work Display for student writing in the classroom!  Love this craft idea!
If you make this type of display for your class, I would love to see and hear how it went for you!

Wednesday, May 6, 2015

Photo Bookmarks and Freebie!

I'm always on the hunt for cute Mother's Day gifts!  This year I found the perfect thing!  There is a freebie at the end for you to use on Mother's Day!
Book marks that mom's can keep forever!  Look how cute these turned out!
1.  I started by taking pictures of students standing next to a wall holding onto a tennis ball.  (Yep, this was totally fun for them!)  The idea of pretending they are hanging from the tennis ball was hilarious and super silly to them!  Later I punched out the tennis ball so it looks like they are hanging from the string!  It's okay if it's not a pretty wall because you will be cutting all that out.
2.  I cut around their bodies and the ball.   On a few of the pictures, I needed to use an X-ACTO knife to cut between their arms.
3.  Then I laminated them. (Yep, this was totally fun for me!)
 4.  You will need to cut them out again, but this time it's much easier because you don't have to be as precise.
5.  Next, I hole punched the tennis ball out!
6.  Each got a tassel attached to their picture.  You can read a great post from Creative Family Moments on how to create the tassels!  Super easy!
7.  Finally, I used double sided tape...
...and secured each child onto their own Mother's Day card!
To get your free copy of the Mother's Day "book" click here!


Saturday, February 14, 2015

Valentine Crayons

Valentine Crayons!
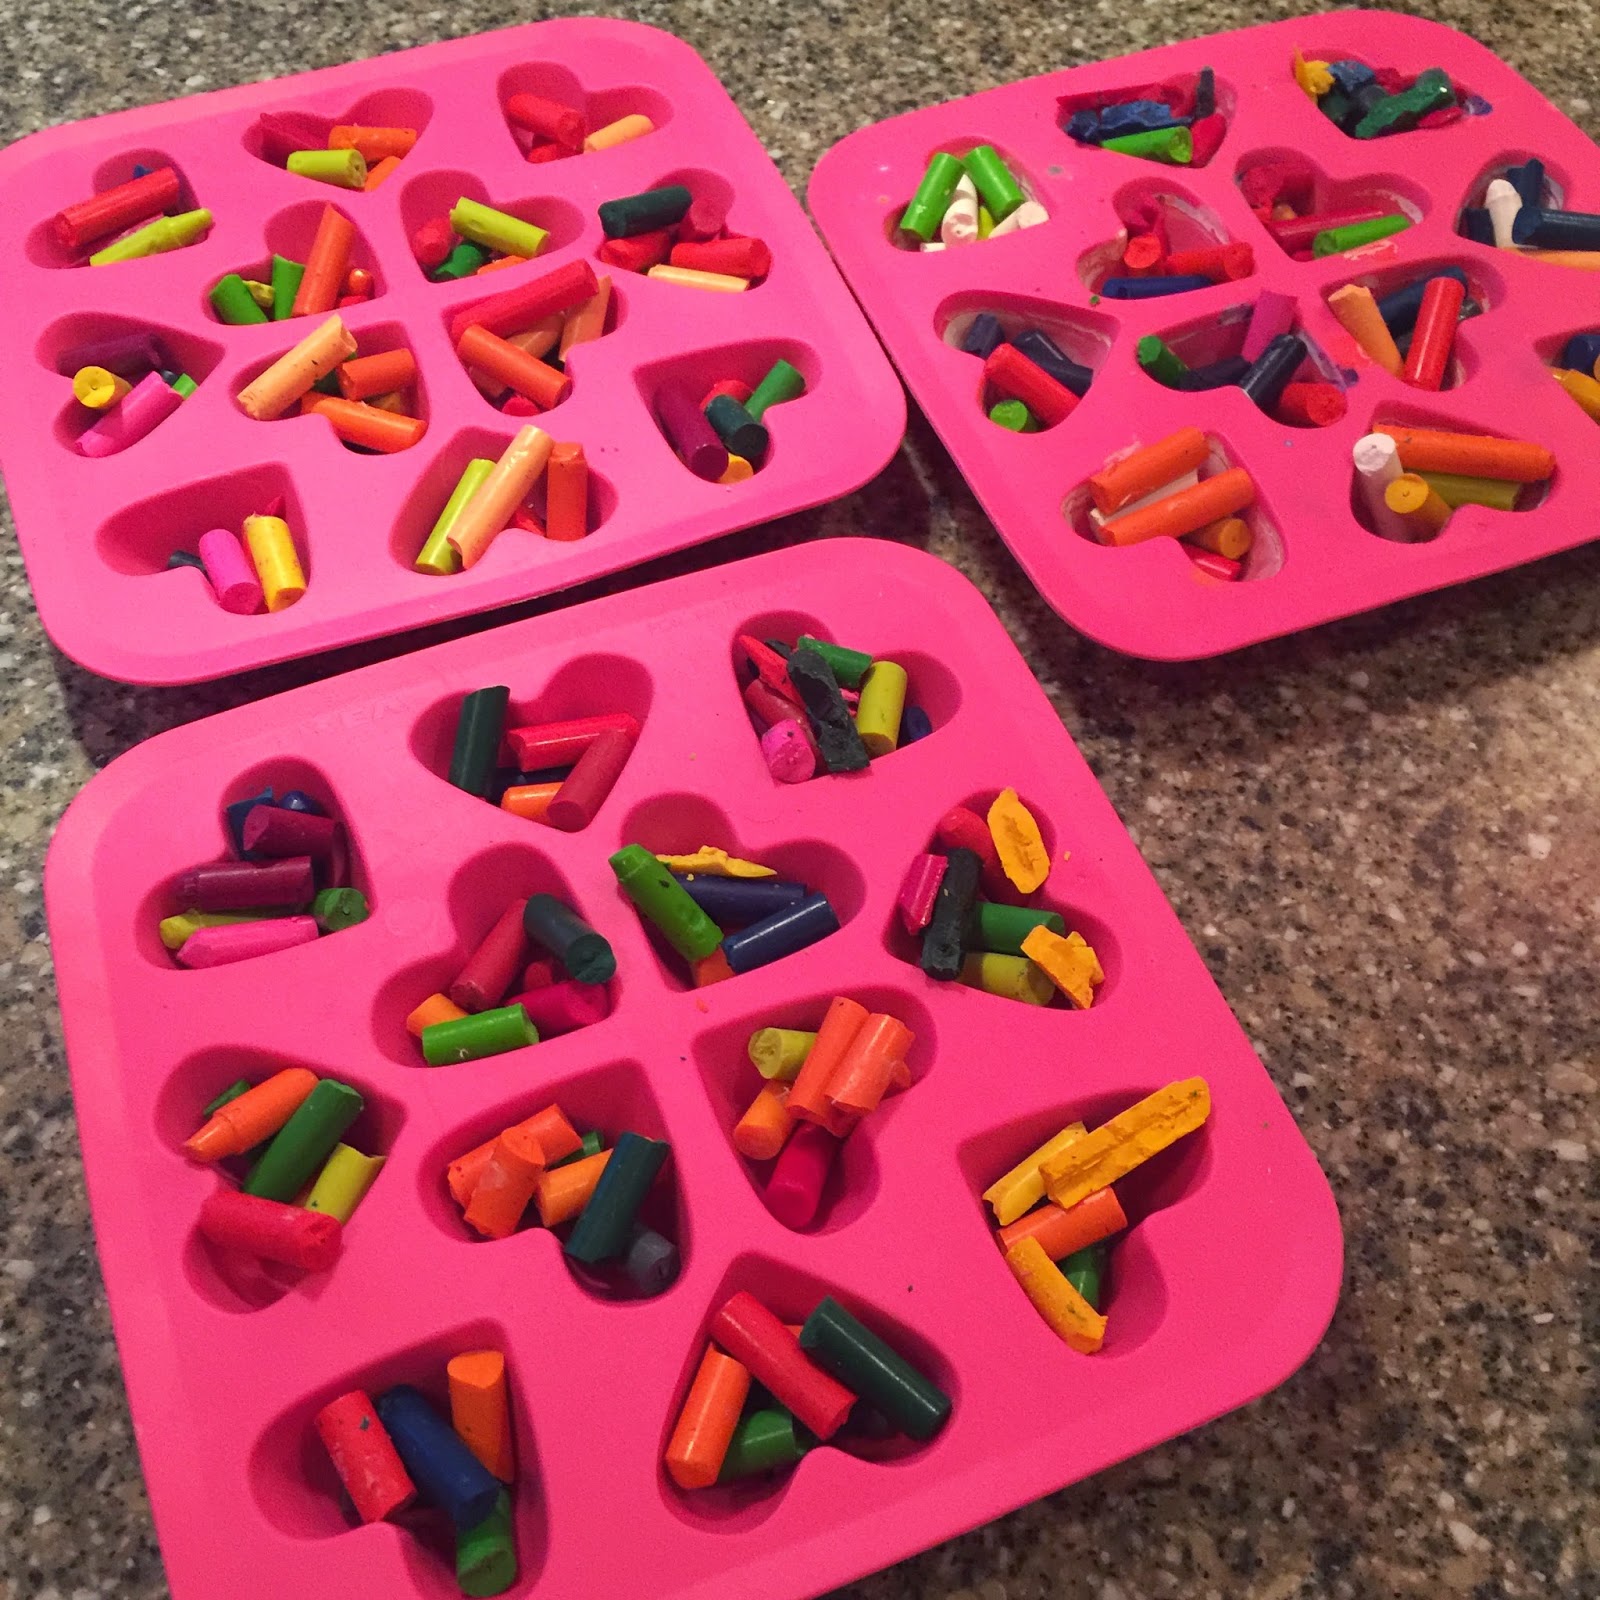
Use a rubber mold.  This one is from IKEA. 
The hardest part is peeling the crayons.  Yep!  I offered the job to my kiddos at recess time!
 Using a meat tenderizer, I was able to get smaller pieces to fill in the gaps.
Put into the oven at 320 degrees for 10-15 minutes.
Allow to cool completely...
Viola!  Recycled, super cute heart crayons!  Add a little typed valentine message and you have a Valentine hit!