Just add an emoji that represents the group in front of each members name. Then when you want to search for group members, just search for the emoji! Easily create work groups, sports groups, or clubs!
This is a common struggle for classroom teachers. How can I have students work independently on their math workbook when they can't read the word problems?
The simple answer is Seesaw (FREE!!)
Seesaw has become my best friend! Seriously! I don't know how I taught without it!
Seesaw is an student online learning journal or portfolio. It has truly changed my classroom and did I mention it's FREE!
I simply record my voice reading word problems from our math curriculum that students may encounter during independent work time.
Hear's how to do it!
1. Click on the "plus" to post to a student journal.
2. Choose to "Add File".
3. Drag and drop your screenshot images! (This is my favorite part!)
4. Choose "Record" to record yourself reading the word problem.
5. Click the checkmark! ( I add it to a folder labeled with the chapter and lesson.) Done!
This is what students the students' view.
Now, when they get to these word problems, they simply click to play my voice!
Easy Peasy!
I would love to hear how you use Seesaw in you room!
In first grade, we teach telling time to the hour and half hour. I have a wonderful class this year and my kiddos scored an 85% on the time unit pre assessment! (This is when I silently cry inside. I love when pre assessment scores are low.)
Instead of focusing my math groups on reteaching concepts, I was able to focus on enrichment groups!
The kids choose to make a video teaching other first graders how to tell time using an analog clock!
Introducing...(wait for it)...HUE Animation Studio!
My kiddos love using HUE Animation Studio! (Can't you feel the intensity of their focus?)
After setting up a good background (Yes that is a plain white sheet. I use it more than you think at school!), we are ready to shoot pictures!
Using something called the onionskin, HUE makes it super fun for the kids to see what was captured on the previous frame laid right on top of the current frame.
Move the minute hand, shoot a pic, move the minute hand, shoot a pic, you get the idea!
It's that easy!
Of course we had to take turns taking the picture (pressing the space button) and moving the minute hand!
I am teaching a unit on the Earth, Moon, and Sun but I wanted to the kiddos to actually see what the Moon orbiting around the Earth "looks" like. I wanted them to Understand the concept of how the Earth rotates and orbits, with the moon, at the same time.
So we created a stop motion animation video!!
We started with a black piece of butcher paper and one of our black office dividers.
Now we just needed props...
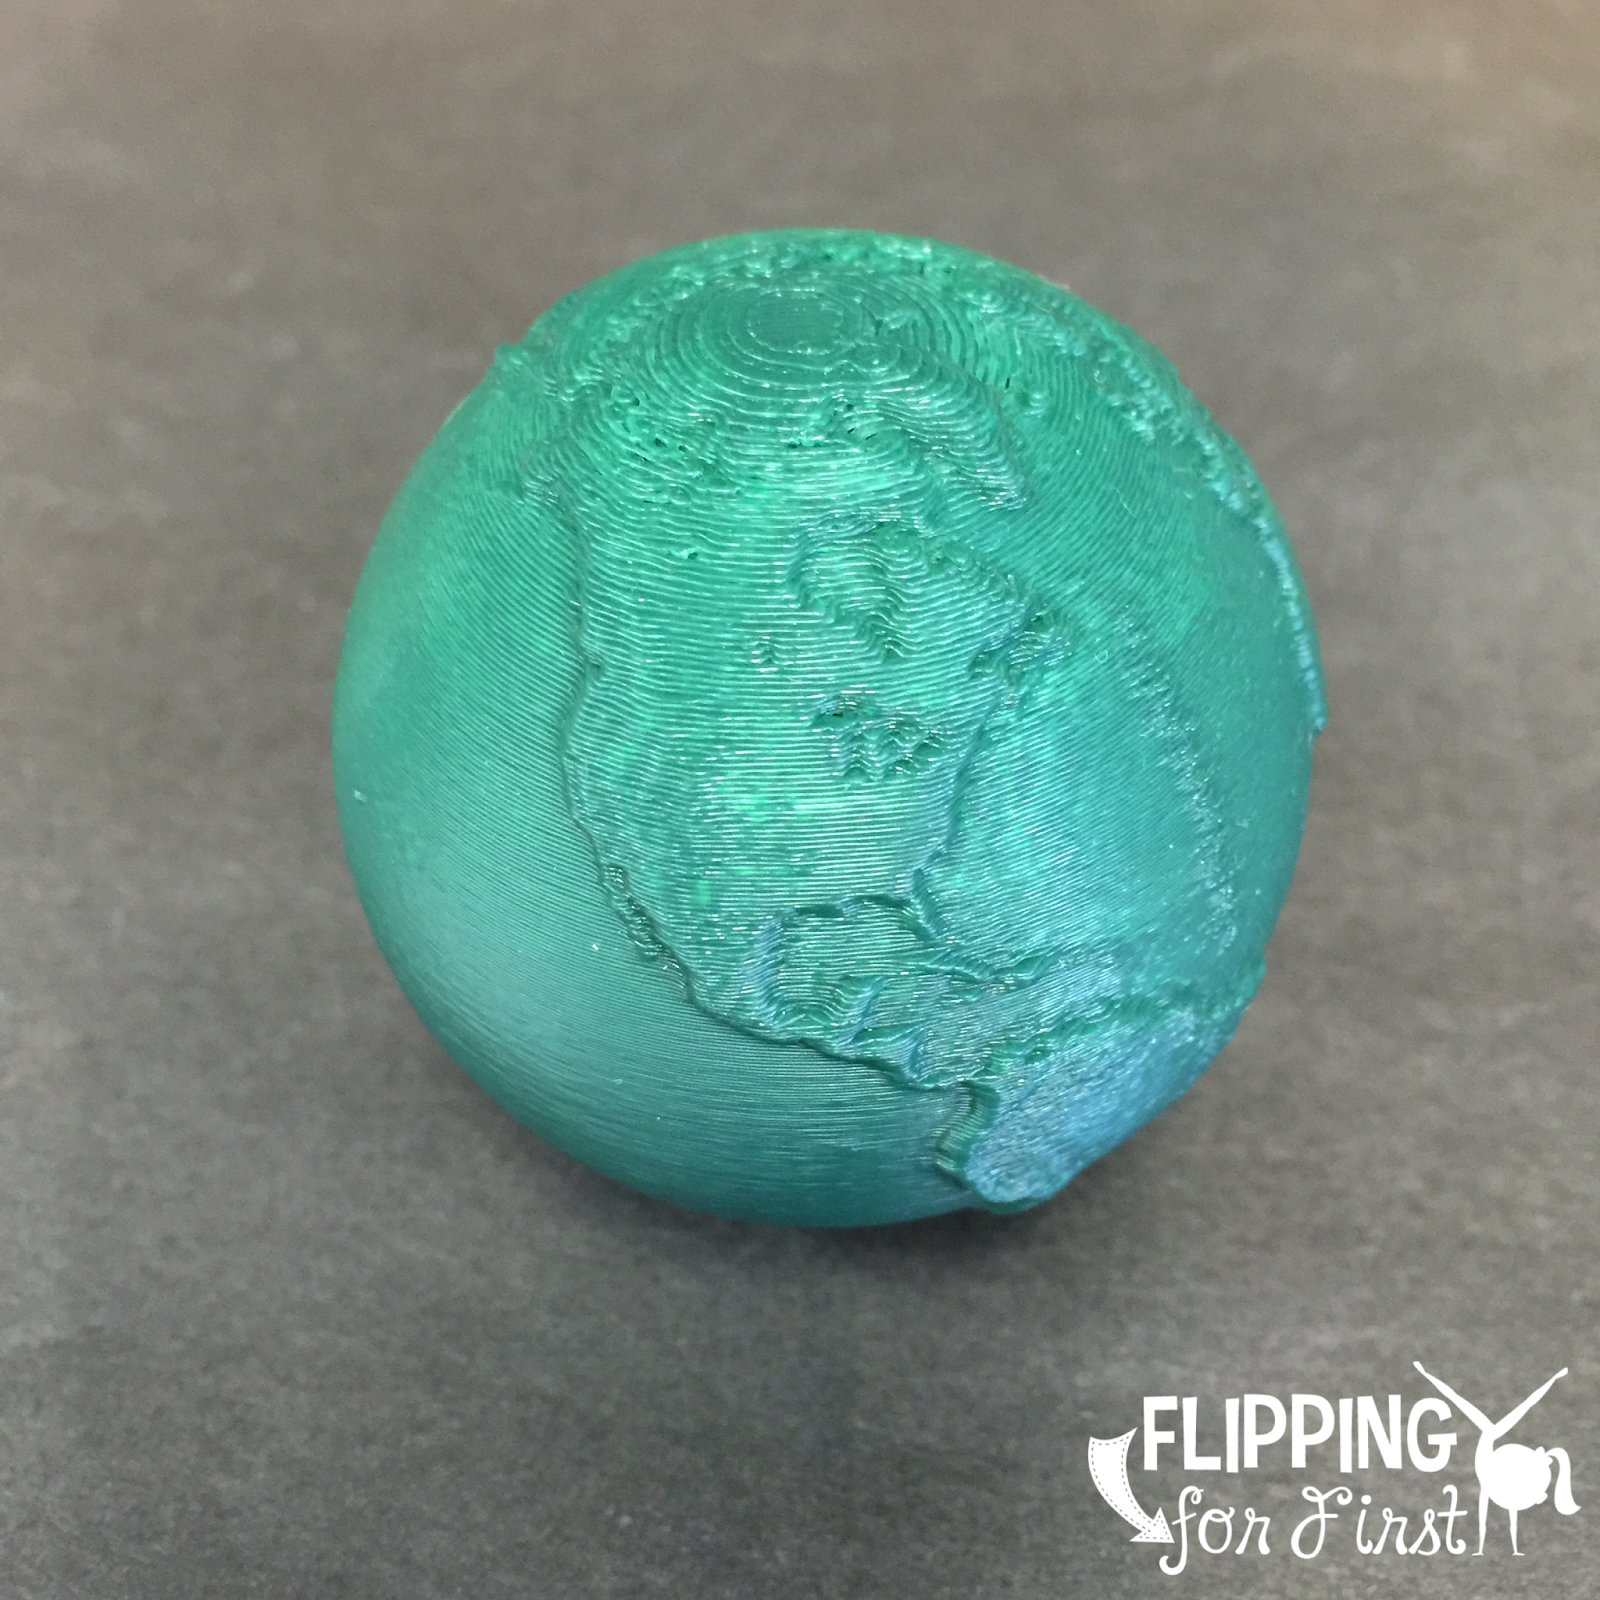
My school is blessed to have two 3D printers! So I created this little Earth!
I bought the sun at a dollar store (a squishy ball) and the moon is a white marble (also from the dollar store).
What makes this super easy is something Hue calls "onionskin." It's a transparent image of the previous frame. This allows you to see where the objects were and exactly where you want to put them for the next frame. (This also helps greatly when a student bumps the sun and it goes rolling to the floor! It's easy to put back in the exact place it was!)
It's simple to add audio! It's a matter of pressing the red button to record/stop recording. Then drag the audio to where you want it in the video.
I invited the students to read facts they learned during the unit on the Earth, Moon or Sun!
I ended up with volunteer readers from each of my guided reading groups! I gave each of the kiddos a chance to practice their part before recording them. They rocked it!
We had so much fun presenting this to the rest of the class! It was easy to upload to Youtube and insert into our classroom website!